Looking for more like Seeds of Hope? Edge Walker by my friend Chris Hampton tells another tale with similar skills and philosophies. Edge Walker’s young protagonist is also faced with escape from a crumbling society. With the help of his grandfather, he begins to learn the skills of survival before he eventually must flee into the deserts of the southwest. The book is filled with lots of action, tons of skills, danger, and a good dose of spiritual skills. If you liked Seeds of Hope, I’m sure you’ll love Edge Walker. And once you’ve devoured it, you can read part two in the series, Into the Veil.
Summer is the time of abundance. There is more food to harvest than we can use. Dehydration is one of the best ways to preserve fruits and vegetable to keep their nutrition. Most information out there revolves around using dehydrators or drying them in ovens and inside, but the other thing that summer provides is plenty of heat and sun! If you’ve never tried drying foods naturally, it is important to learn since our setting can have a huge impact on our ability to dry and store foods. Humidity can be your biggest challenge. So following are a few things I’ve learned about naturally drying fruits and vegetables.
Vegetable greens are dried easiest by bundling them and hanging them. Make sure to hang them in the shade, else the sun will bleach some of their nutrition. If you’re battling humidity, make sure the bundles are smaller, allowing more air movement. If it is very humid, you may need to move them near a fire or primitive oven. You can even dry them on a rock placed near the fire. Just be sure to remove them when they are thoroughly dried.
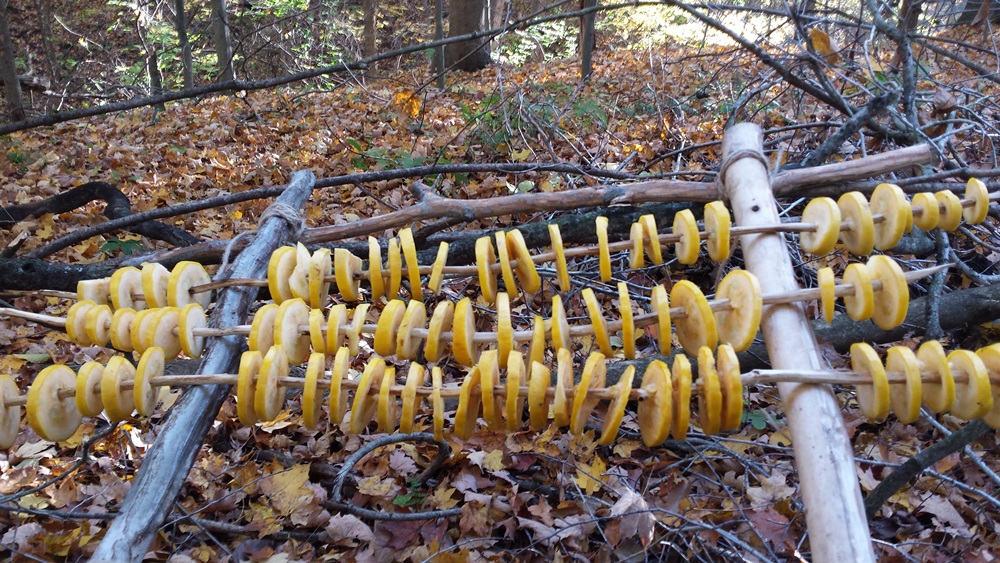
Denser vegetables, like roots and zucchini, need to be thin sliced to dry. Zucchini, or other vegetables with a soft core, can be put on sharpened sticks and laid on a platform to dry. The thinner the cut, the quicker the dry. Just make sure each piece is not touching. Potatoes, bulbs, onions and garlic can be thin slices or chopped and spread out on a platform to dry- a piece of wood, a mat made of grass or cattail, or even a platform of small sticks. If they get air from below as well as above, they will dry quicker.
Fruits can be dried directly in the sun. If the fruit is small, like berries, they can often be dried whole- just spread them on a mat or platform as you would the root vegetables. Larger fruits need to be thin sliced before drying. You can also mash some fruits and spread on a mat to dry as fruit leather. Most fruits retain some moisture when dried.
How you store dried foods is as important as getting them dry in the first place. Especially if you have high humidity, your dried foods can be ruined by reabsorbing moisture before you’re ready to use them. It is best if you can create sealed containers for storage. You can make a coal burned wood container or pottery with lids and use wax or sap to seal. Do not use rawhide containers since these absorb the moisture from the humidity as well. If you don’t have humidity issues, they can be stored in open containers or greens can just stay in their bundles, hung from the rafters. It will take experimenting to find what works best in your area. Check your stored items frequently at first to determine if you’re food is remaining dehydrated. Storing in closed areas, such as root cellars can help keep foods dry. Now is a great time to experiment with drying foods- either store bought or foraged. So enjoy the sun, and make some yummy foods to enjoy this winter! #dehydrated vegetables#dehydrated fruits#food preservation#bushcraft#primitive#outdoors#nature
The coronavirus has many people feeling a bit ungrounded at best, and near panic at worst. The most important skill we need for survival though is to remain calm and be able to assess our situation. Although most of us are safe in homes, with food, utilities and everything we Need, we are still left feeling ungrounded and unsure of the future. Following are some suggestions of things we can do for ourselves and families to help us stay grounded and positive during this difficult time.
Stay informed, but don’t obsess on the news. I get my information from sites I trust and read the information. I saw the news once and can understand why people are panicking who watch it. Remember their job is to sell news. It’s sensationalized and focuses on the worst case situations. Learn what is really going on where you live and what you need to do to remain safe. Then let it go- don’t make the virus the center of your world.
If the virus has exposed you to the reality that you wouldn’t know how to survive and care for your family if things fell apart, use this time to learn. There are countless resources online to learn about wild edible and medicinal plants, survival skills, books you can order. Choose a topic and begin learning. Remember, the sacred order of survival: Shelter, Water, Fire and Food. Focus on these skills. There is nothing more grounding than actually taking action to make yourself more self-sustainable. I’m part of a group who created a website, www.centralfire.us. It has a wide variety videos, articles, books and recommendations for a wide range of primitive living skills.
Use things around your home to practice these skills. Just from watching a video, you could try your hand at making cordage from string or corn husk. You can practice making a coil pot from playdoh. You can make a model debris hut or shelter. Use the information you’re learning and create something! Making things, using our hands, being creative are all very grounding. Involve your whole family.
If you need entertainment, consider shows like Alone where you can observe and evaluate how the skills and mental attitude of the contestants helped them thrive or fail. Read books about survival, spirituality or other topics that help you think through survival situations. Might be a good time to re-read Seeds of Hope!
Slow down. What a wonderful opportunity this is for many. If we step away from the fear and worry, we are left with time that is not usually within our grasp. I keep hearing about boredom, but that is a choice. Consider this time a gift and meditate, breathe, go outside if that’s possible, walk slowly and become aware of everything around you. Take the time to access your life. Are you really happy? Are you doing what you love? Is your life just a routine that you find boring? What is it that you really want to be doing? What gifts do you have to bring to the world? Use this time to find your inspiration, to find your connection with the Earth, to find the path you want to be walking.
We can look at this pandemic only as a curse; see only the pain and suffering, look only at the inconveniences its brought. Or we can use it to see more clearly the world we’ve created, the damage we’ve done to the Earth and tremendous need there is for us to change. Just look how nature has responded to the pandemic- cleaner water, more wildlife, sea turtles laying countless eggs undisturbed, air is clearing, CO2 levels are dropping. In just a few weeks we are already able to see evidence of the tremendous negative impact we’ve had starting to improve. What can we learn from this? Will we just go back to the way things were? Or will we join together to change the way we, as a society, live our lives? Hope can be the most grounding force of all.
When we began Ways of the Earth Living Museum in Indiana, we each planned to build our own long-term shelter, and each needed to be different so our guests would have a variety to experience. I had fallen in love with the spiral lodge of the Algonquin which was only known because they found the post holes at an archaeological site. They made conjectures about what the structure would look like but no one really knows how the roof was, or even what the building materials were.
I decided to build this and started with a model, which
modified my ideas for the what would work for the roof. We had a volunteer week
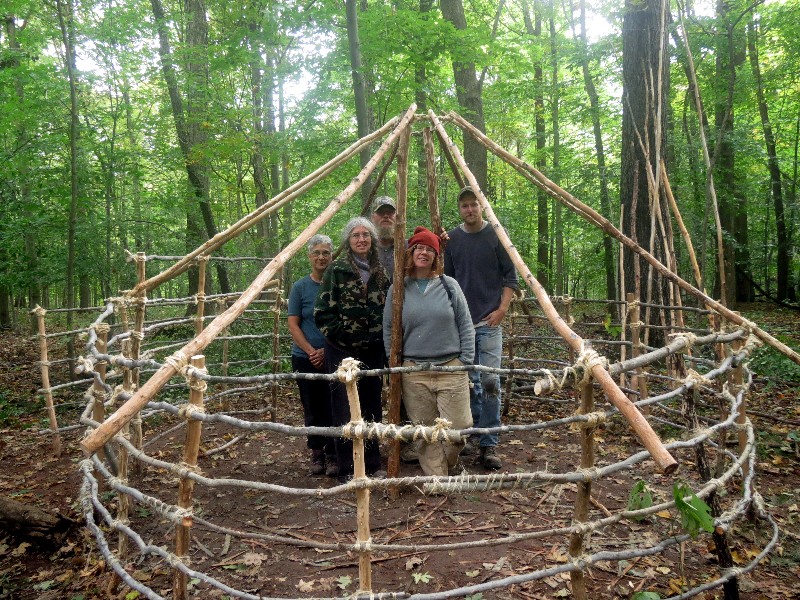
so I got a lot of help in creating the initial structure.
The structure is 10 feet with the spiraled entryway added
another 2 ½ feet. The poles in the ground were deadwood, originally 5 feet,
with fire hardened ends pounded into the ground about 1 ½ feet. Then green
saplings were bent and tied to create the walls.
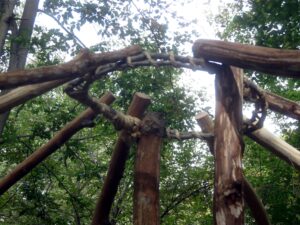
Originally two larger poles were pounded into the center,
but eventually, as I added material, a third support pole was needed for weight
bearing. I created a twined sapling hoop and attached into the notched poles.
This had to bear a lot of weight and I was afraid it was the shelters weak
point. But fortunately, for the year and a half that this stood, it held up
fine, even with a couple feet of snow on the roof.
We then began, adding the roof poles.
Here’s my great helpers and with the roof
frame started.
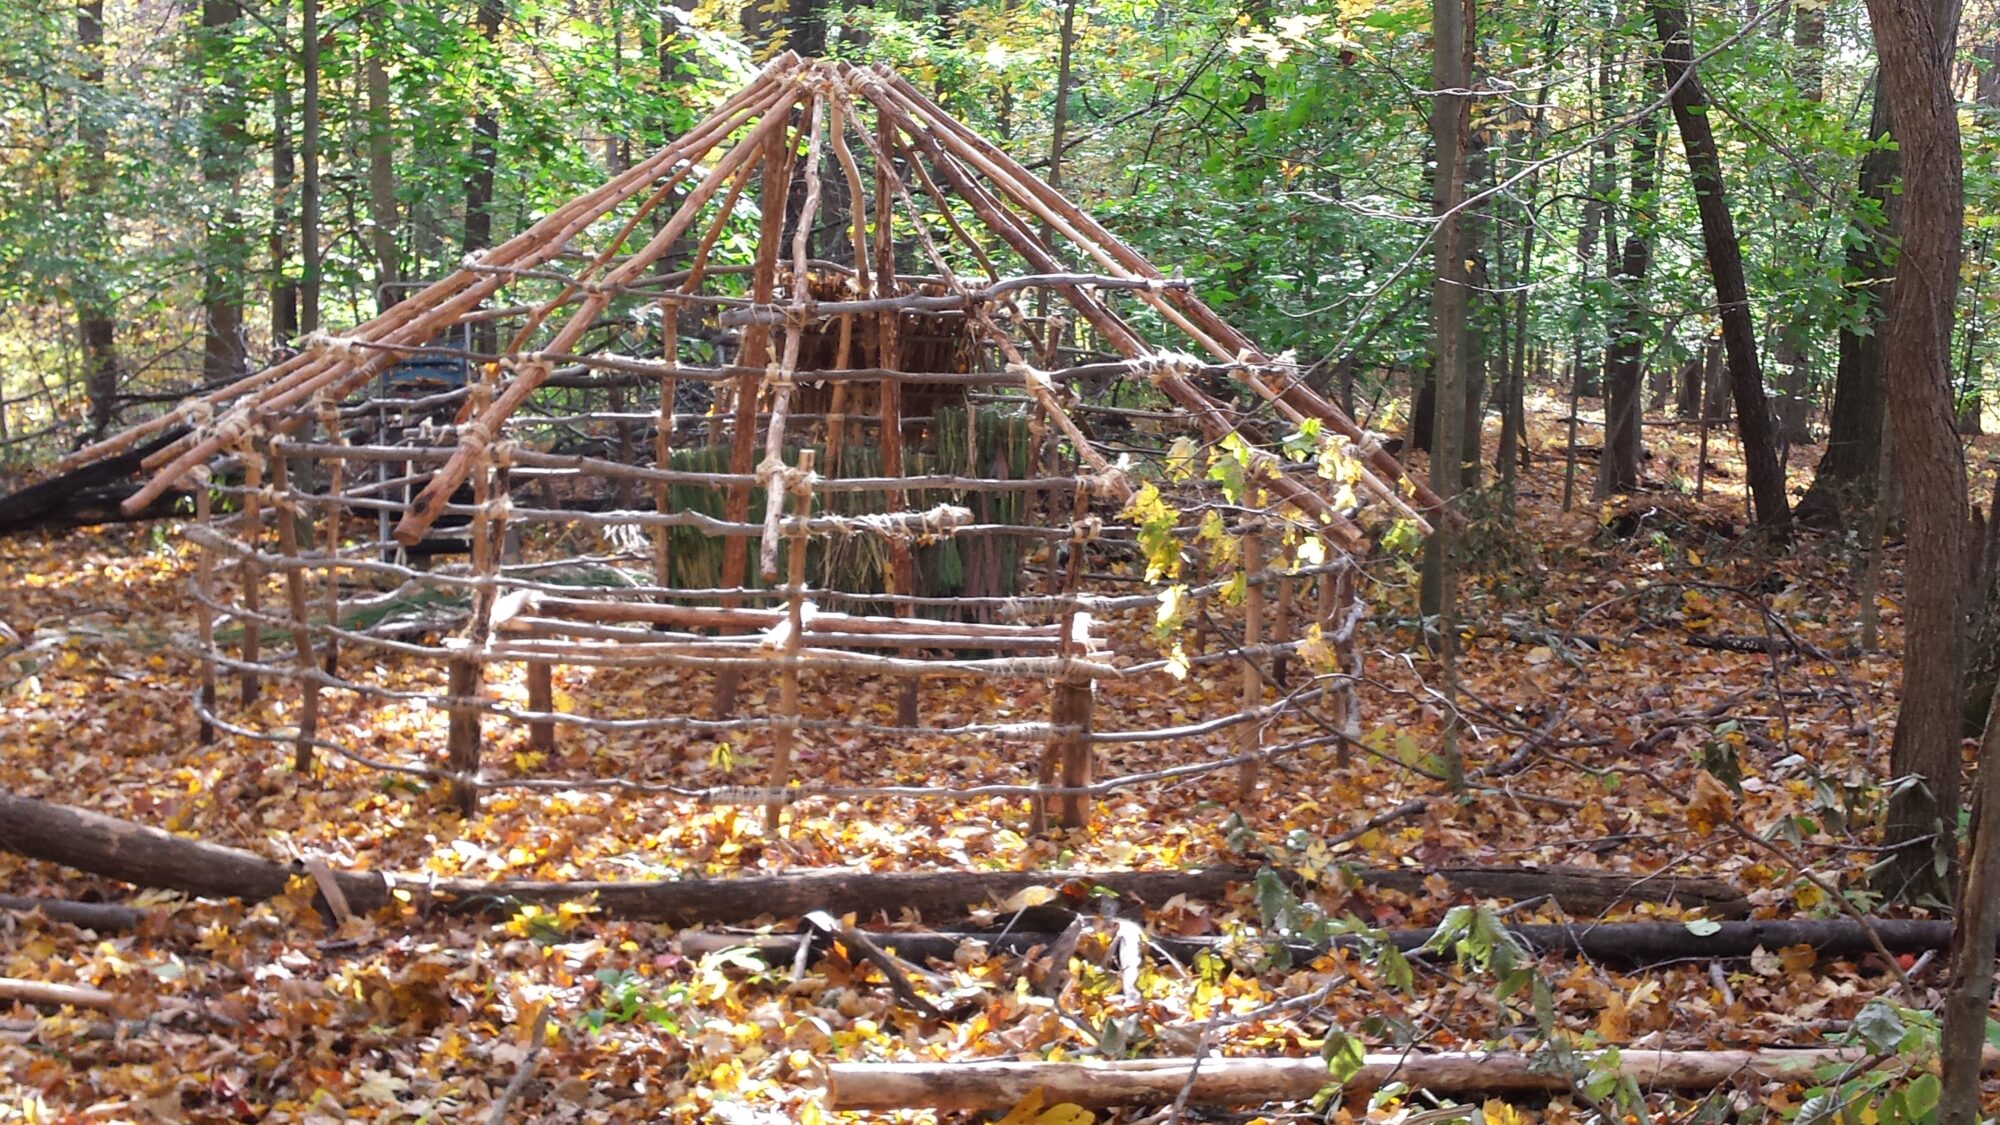
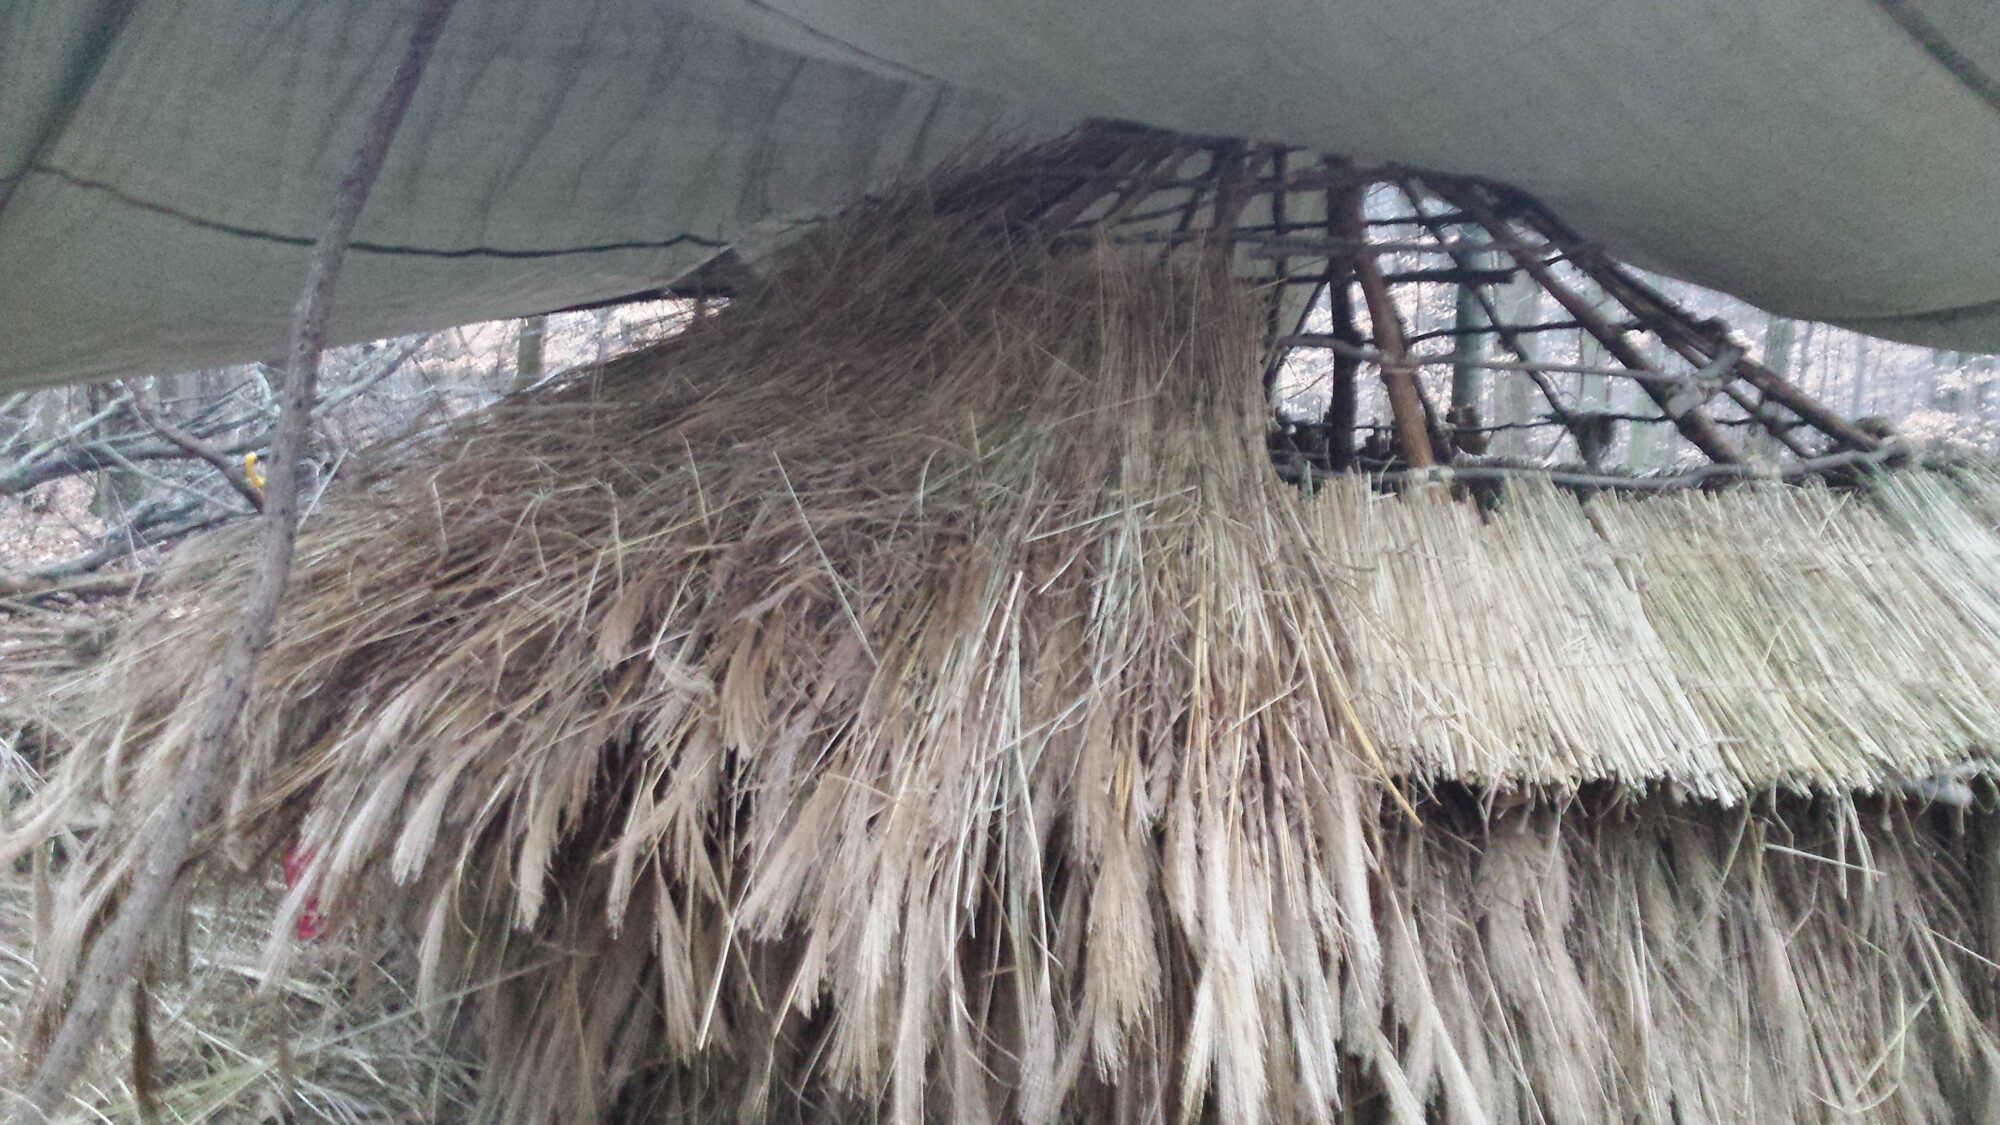
From here, I had to finish adding the roof beams and then
did a spiral wrap to the top with green saplings. Here it is with just a ways
to go with the spiral roof wrap.
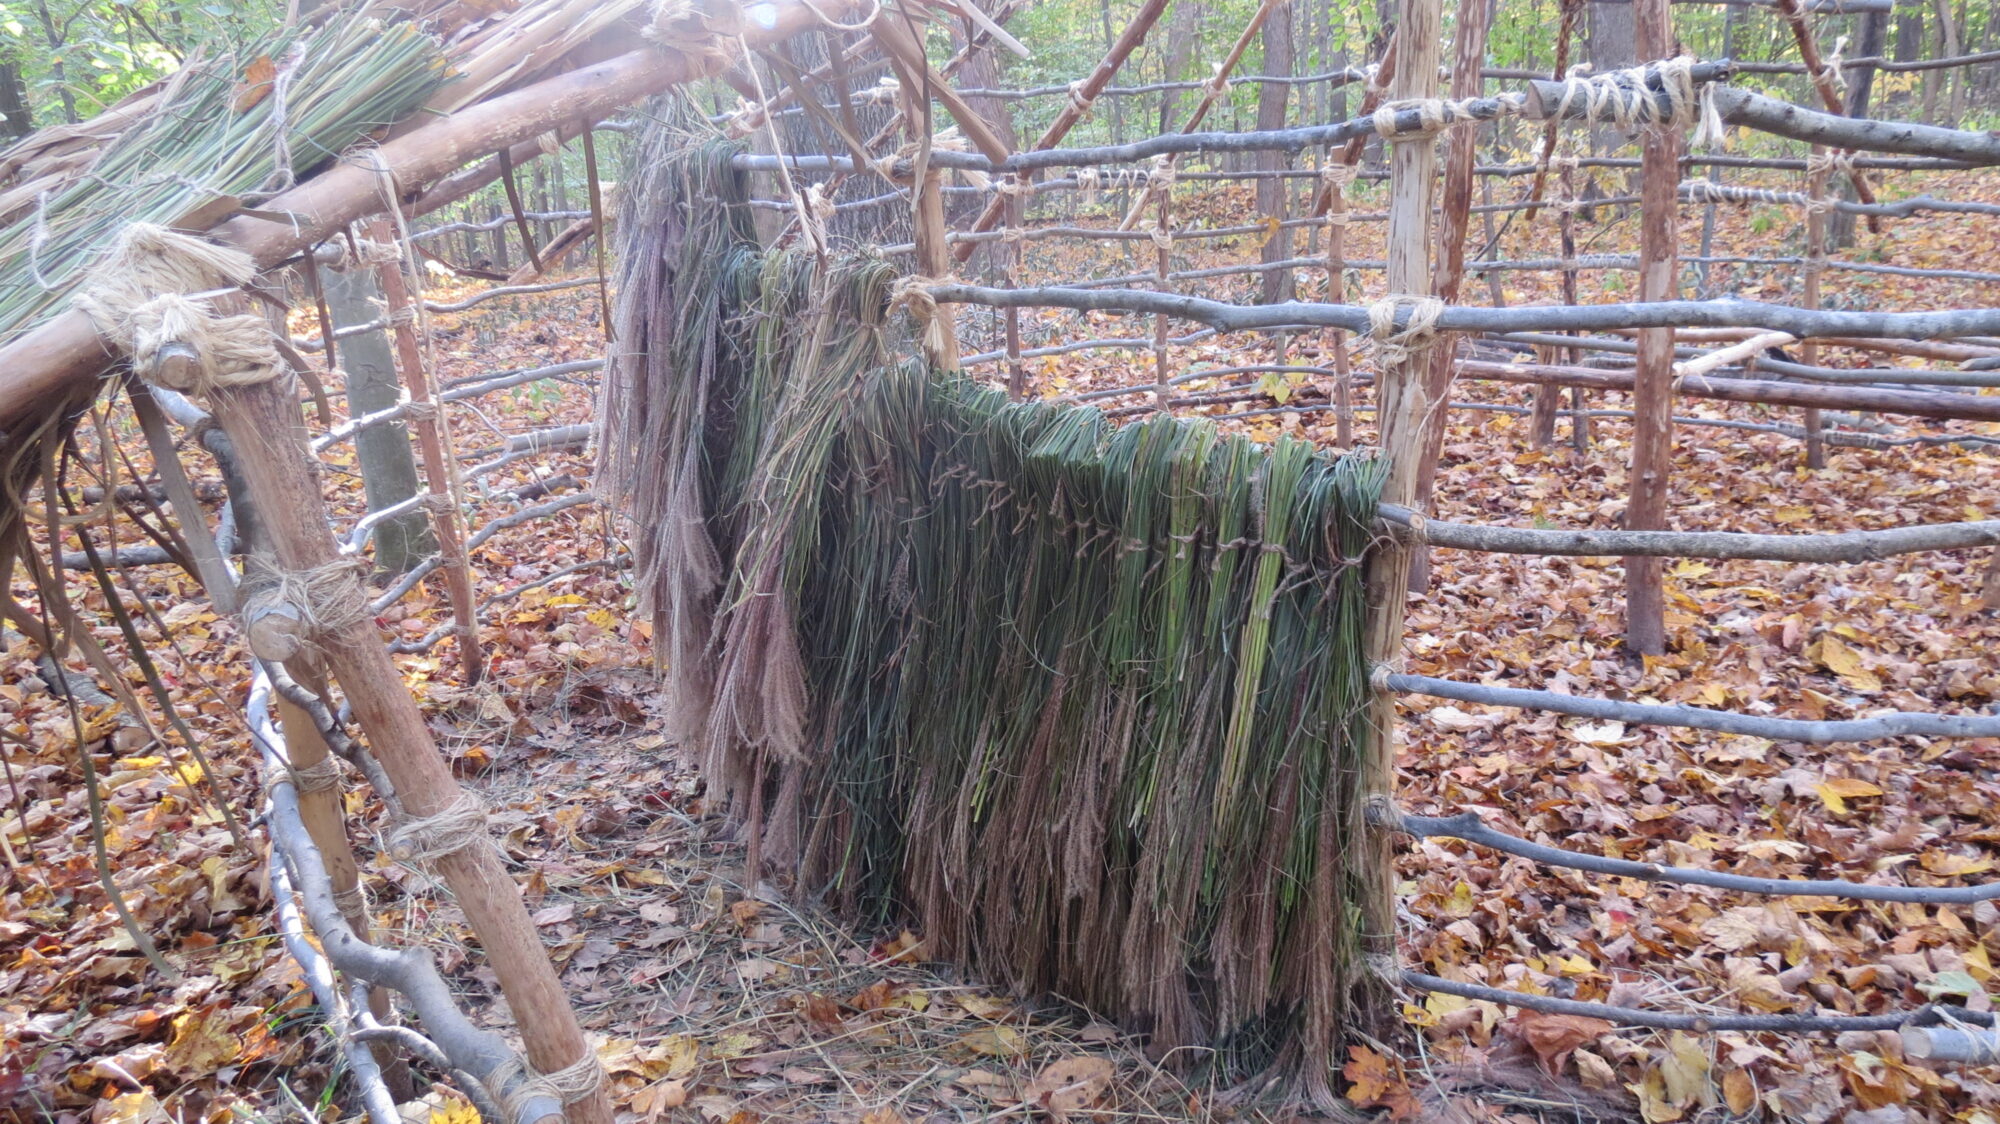
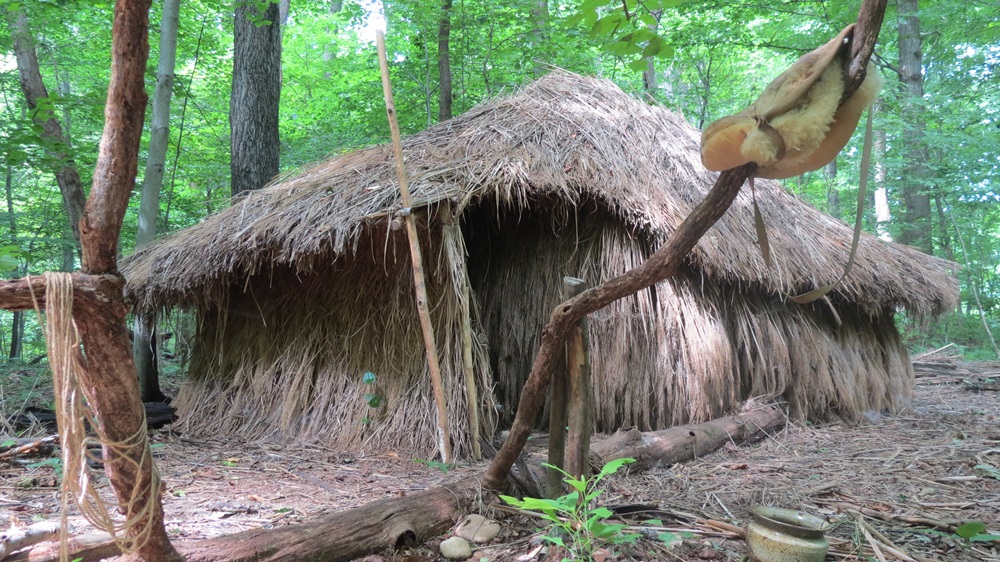
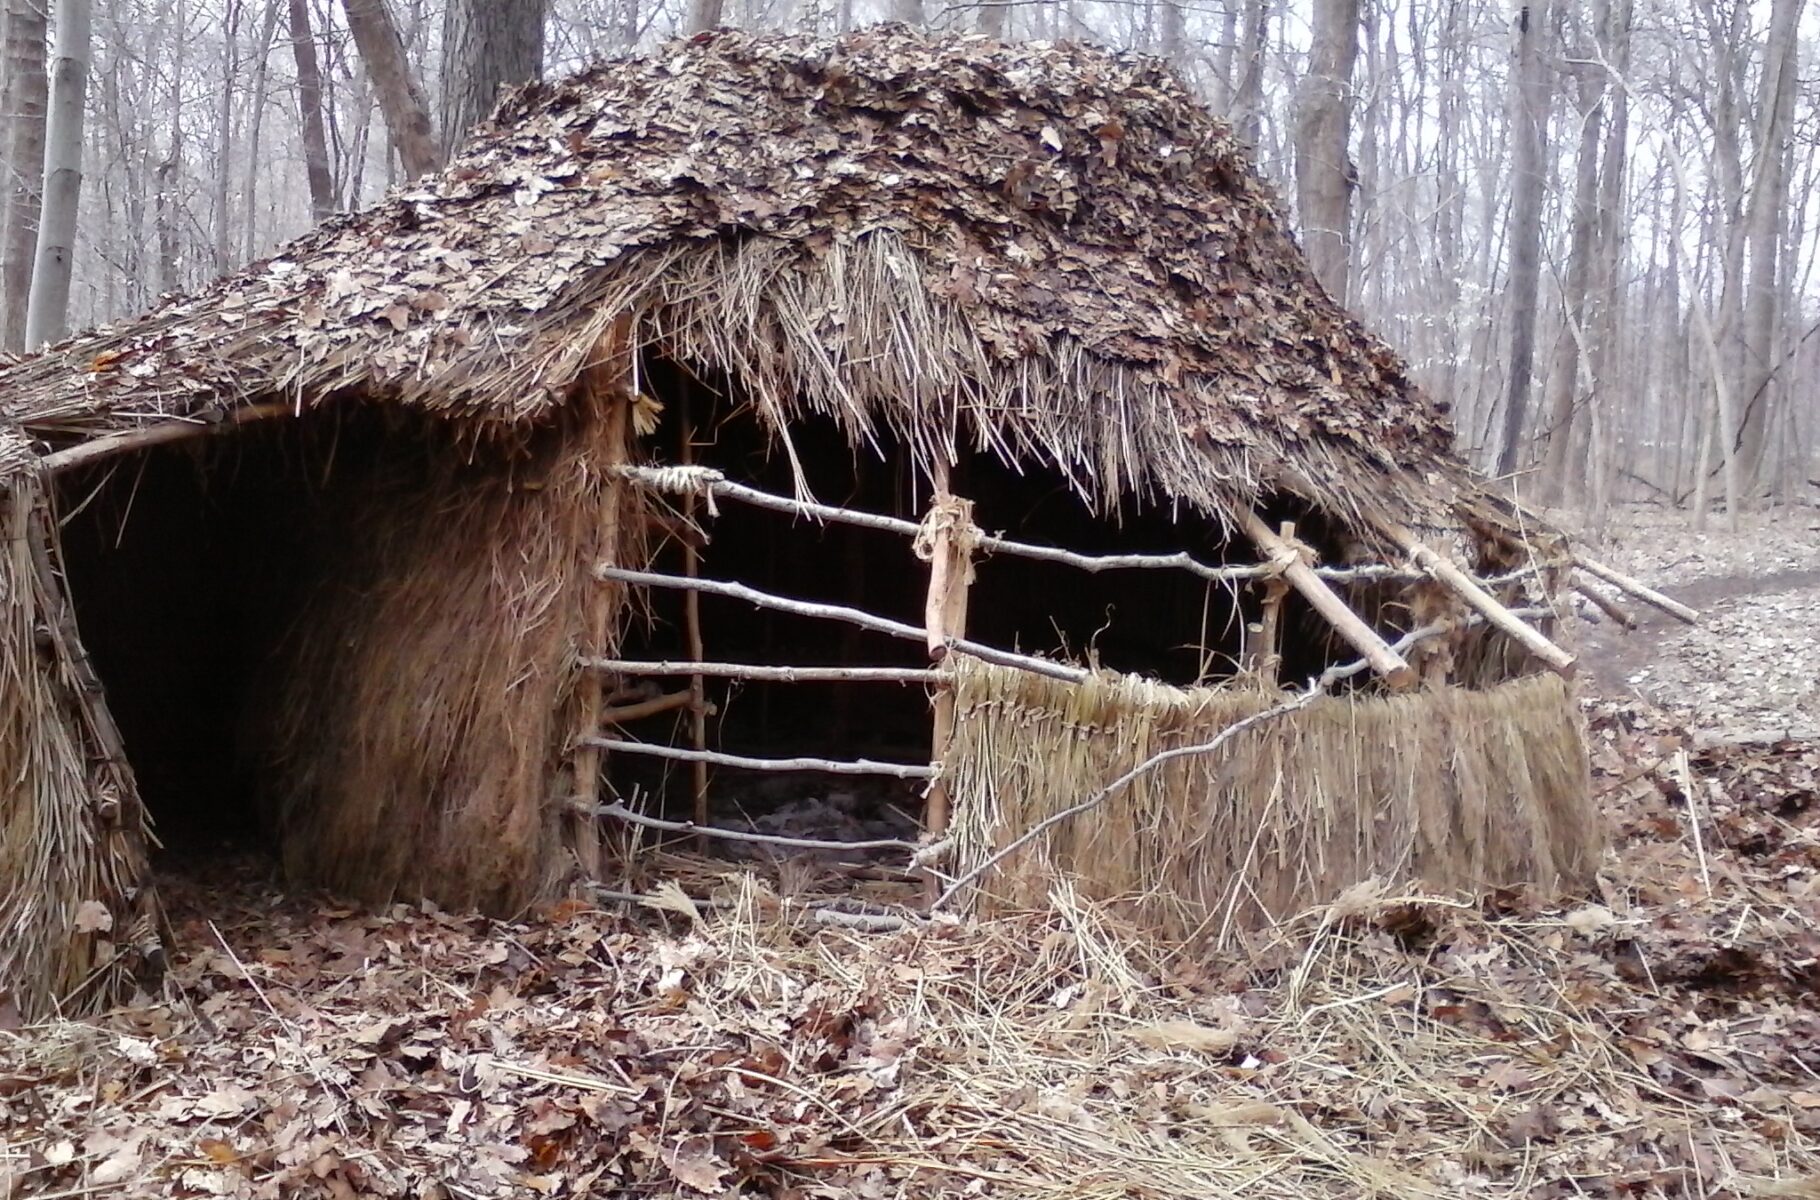
And then it was time to thatch. I had decided on thatching, since it would be different than what the others planned. In this environment though, it wasn’t a good choice because it took an incredible amount of grass to thatch this small shelter. We ended up using ornamental grasses we had to go harvest from folks all over the area. It was a great learning experience, not to mention, beautiful, so glad I did it.
Some things to consider if considering thatch. First, like I said, it takes so much more material than you might think. We’d go and harvest a huge amount and in a surprisingly short time, it was already running out. We thought we had enough to finish multiple times. Another consideration is how much string it takes to tie thatching. If you were to use natural cordage, it would take a tremendous amount. The last thing I found, after moving in, is that thatch is great when there is no wind or gentle wind. A strong wind, however, can blow the cold right through the grass. I had planned a debris wall for winter, but my first winter I ran out of time so had just the thatch.
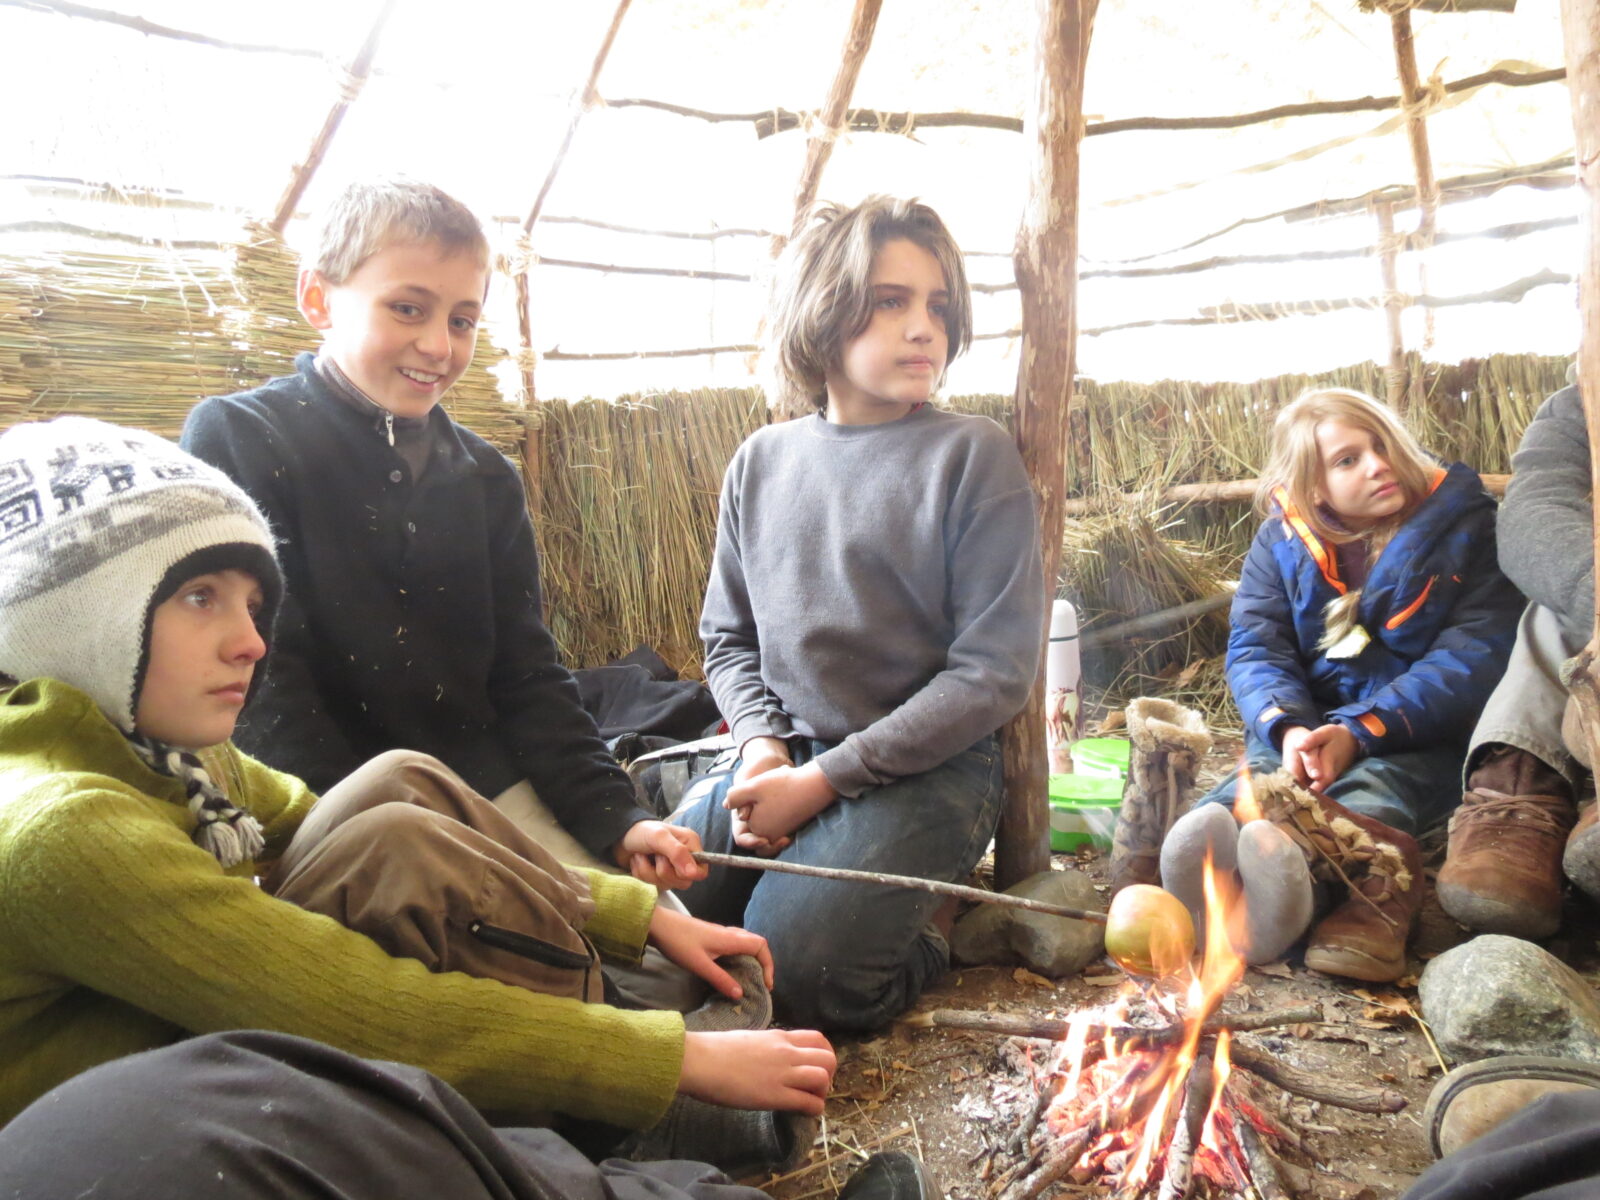
Wild Nature Project kids came to help for a day and we had
the first fire inside the shelter. This is about a month after starting
thatching and pretty much thatched all day, so you can see how long thatching
takes.
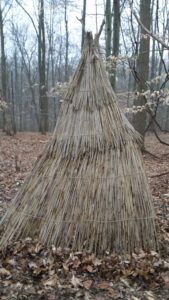
Here it is about two months into thatching. I made cattail
mats for the roof edges to support the roof thatching and here we’ve started
adding the roof thatch. We probably had to stop to go harvest more grass!
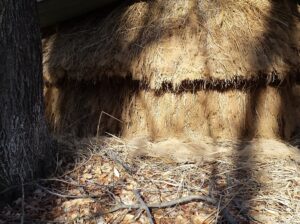
Here’s haircut day. The top still has a tarp on it, but I
got moved in.
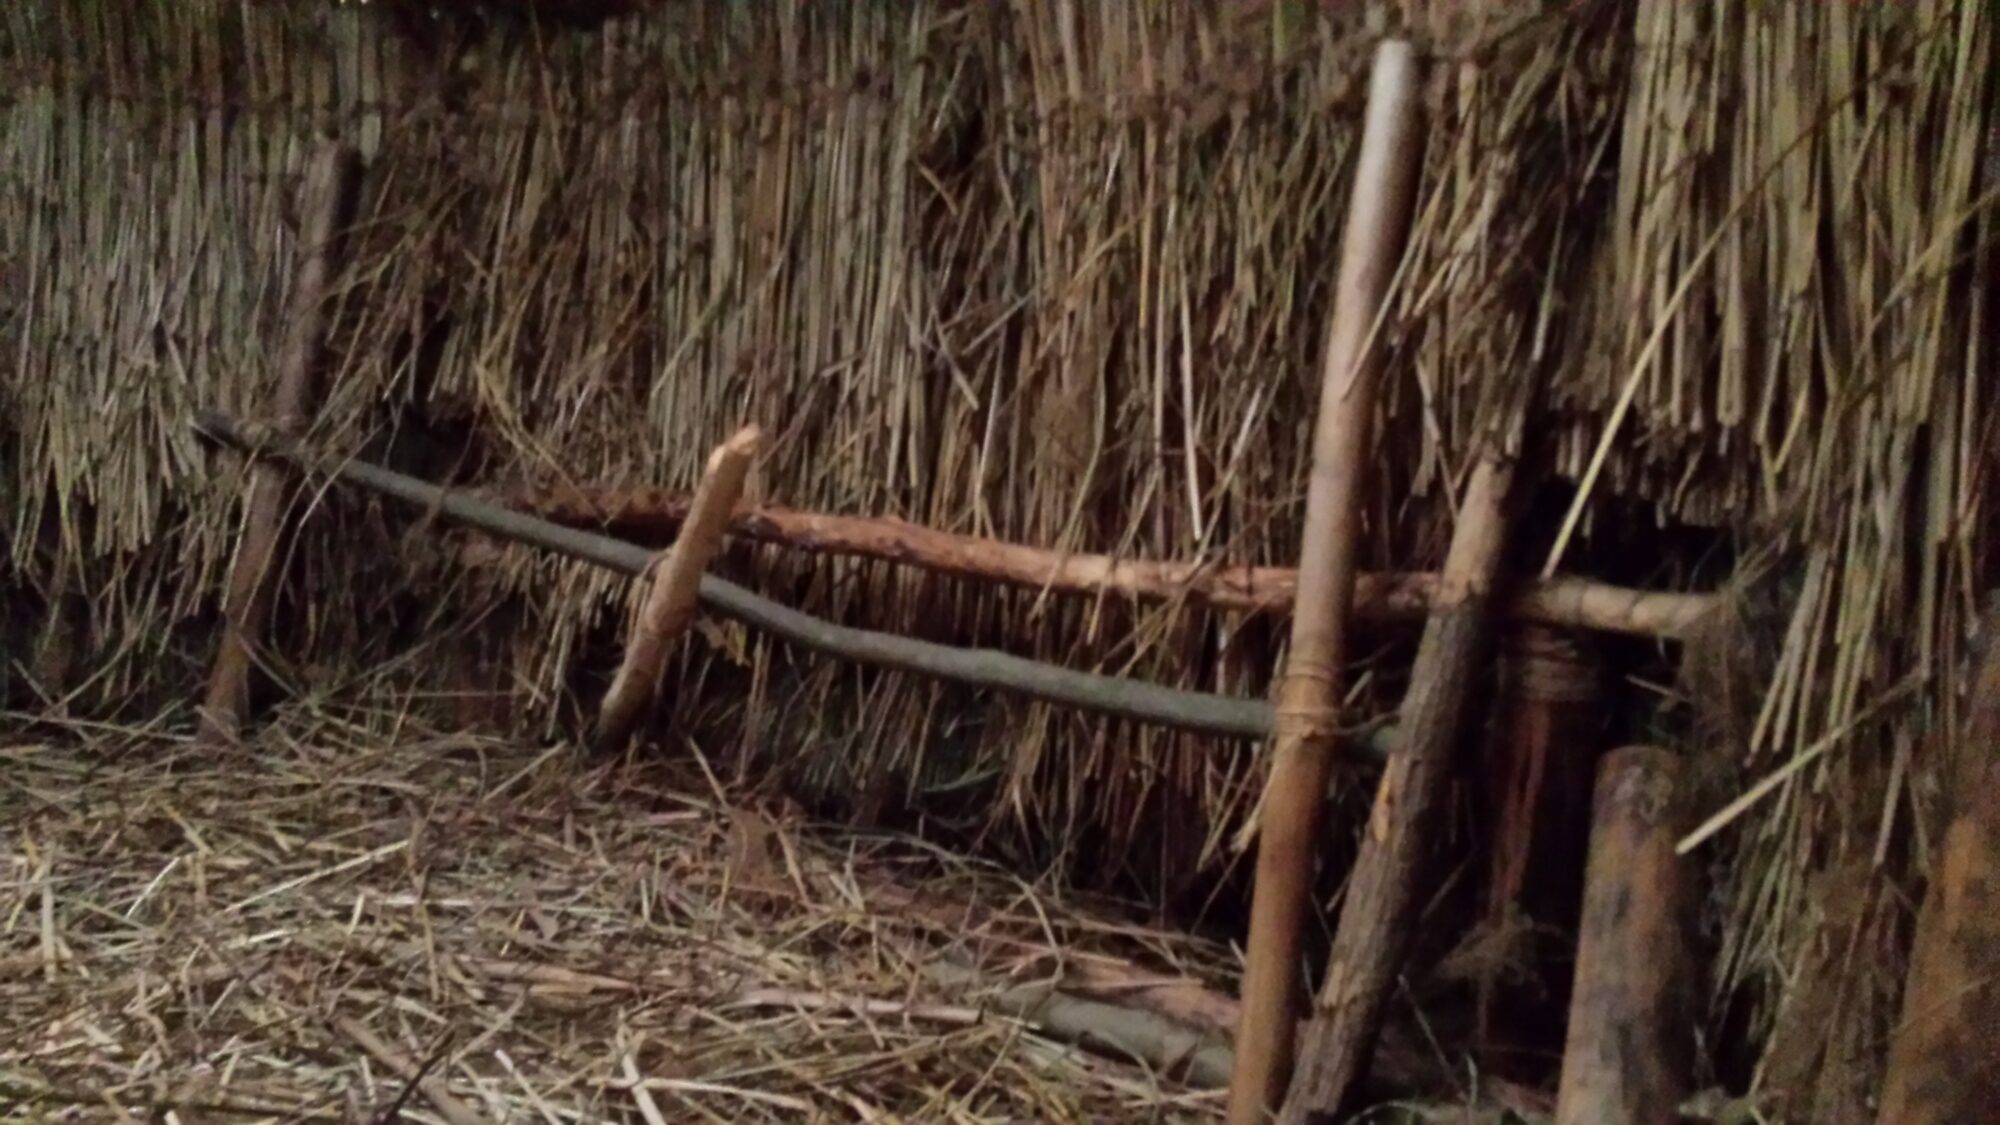
I had tied in a frame for a raised bed before thatching, but by now, the ground was frozen, so I couldn’t pound the frame in. I ended up just having my bed on the ground and never finished the bed. The frame that was tied in made a nice back rest though, once a hide was draped on it.
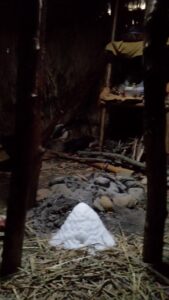
I built a number of shelves in the shelter for storage. My fire pit was offset from the center, and when it snowed, I would get a little pile inside. I did not make a smoke hole cap, as very little rain or snow actually came in. One great thing about this shelter, I and don’t know if it had to do with the spiral entrance, but it drafted incredibly well. I never had problems with getting smoked out. sometimes, it might hang at the ceiling if the air was heavy out, but mostly, it just rose right up and blew away!
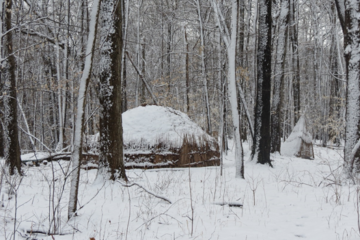
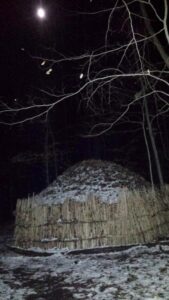
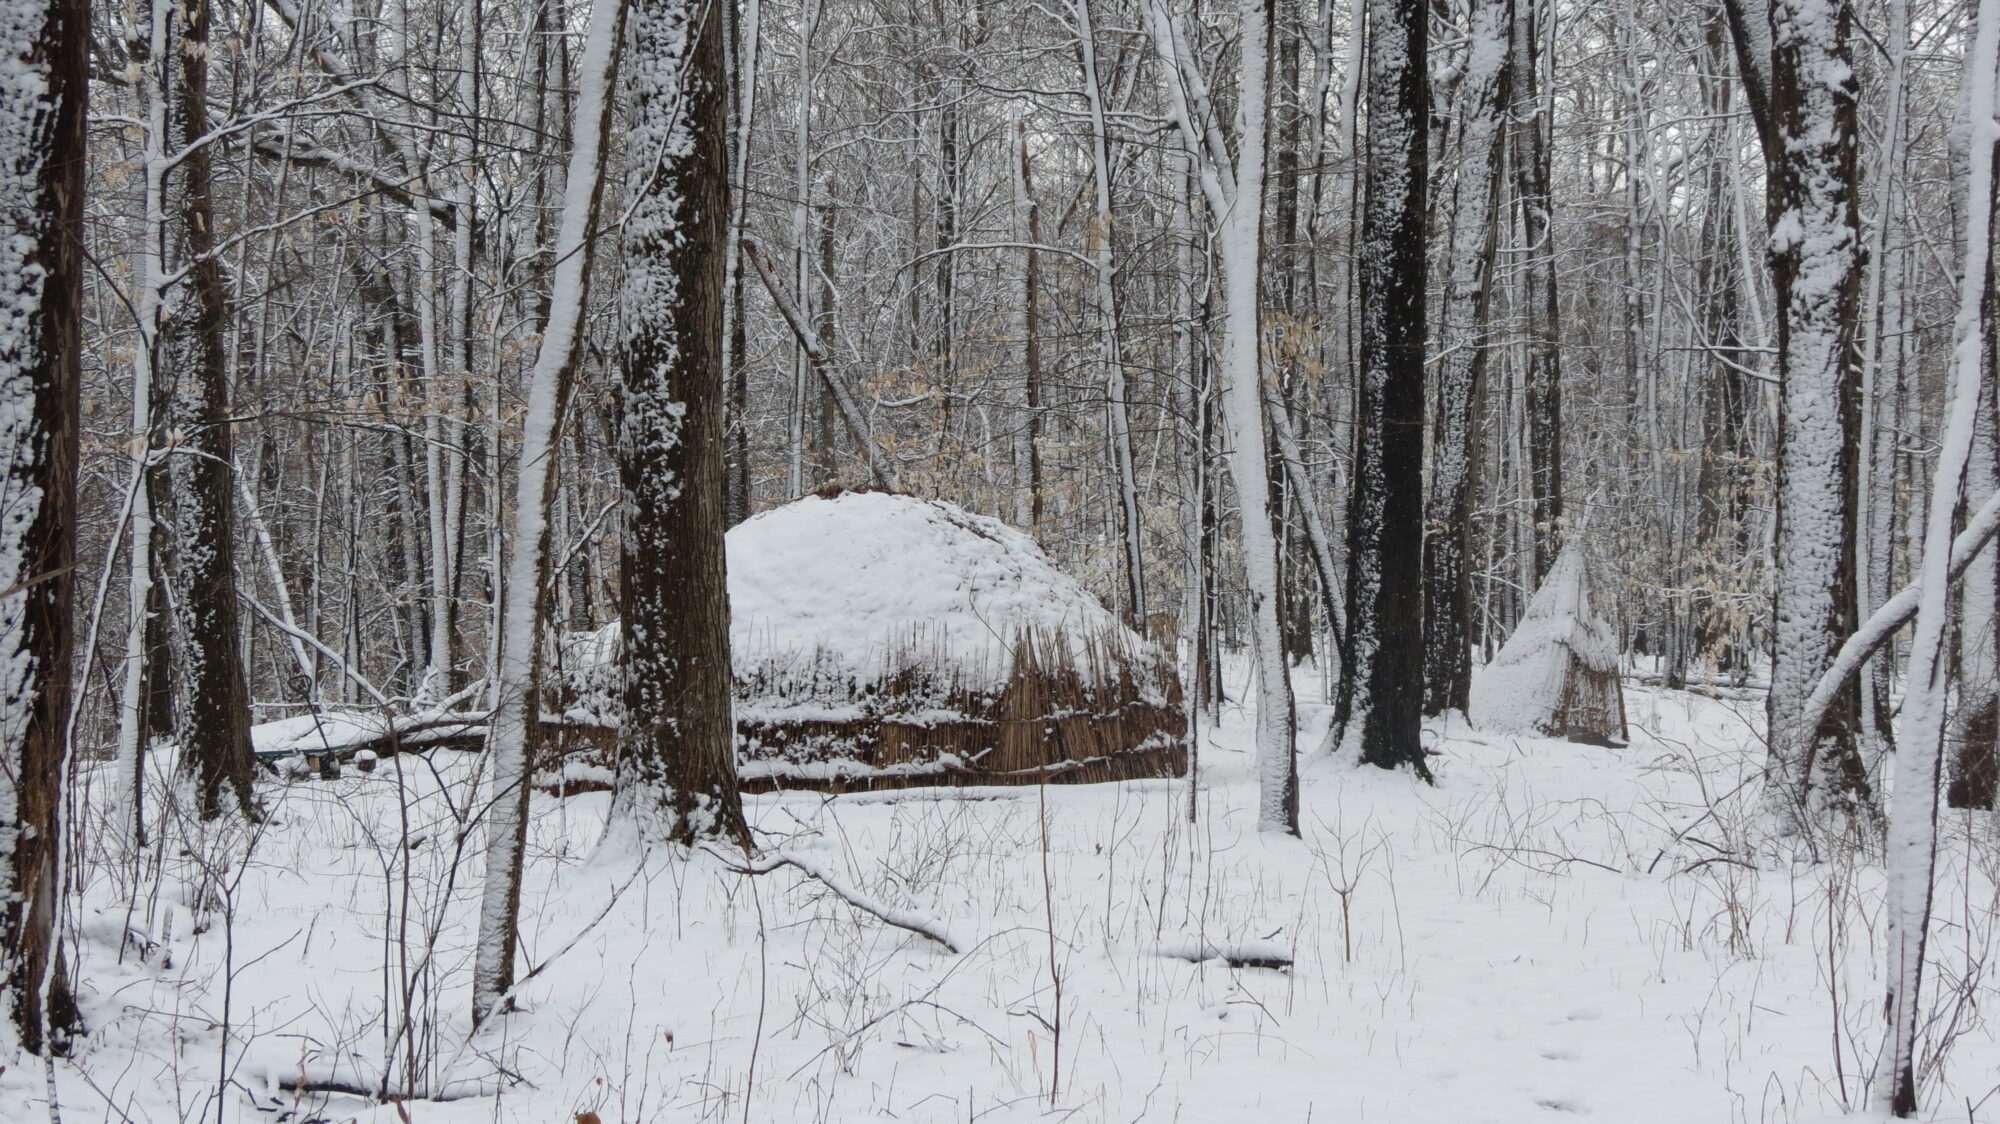
Here she is in the snow. I stayed in this shelter all winter except for two nights. It was forecast negative 15 degrees Fahrenheit with 38 mile per hour winds. I wasn’t willing to risk our lives on the shelter, especially with the winds, so I loaded up my kitties and we moved down to the office for a couple nights. Otherwise, with a small fire, the shelter worked even without debris walls and that was to a temperature of negative 5 degrees Fahrenheit.
I found, since I only used small wood and didn’t keep the fire going for the night, that the shelter got down to about 3 degrees warmer than it was outside. So it was cold until you got a fire going, and I had some problems with water freezing, but those are the lessons you learn to deal with and the fun of living in a shelter. When it rained, I found a few leaks and added thatch over those spots, but it was localized. One really windy rainstorm, however, blew the rain threw the thatch everywhere and everything in the shelter pretty much got wet. So there’s always something to learn!
Here she is after surviving her first winter and enjoying
spring and summer.
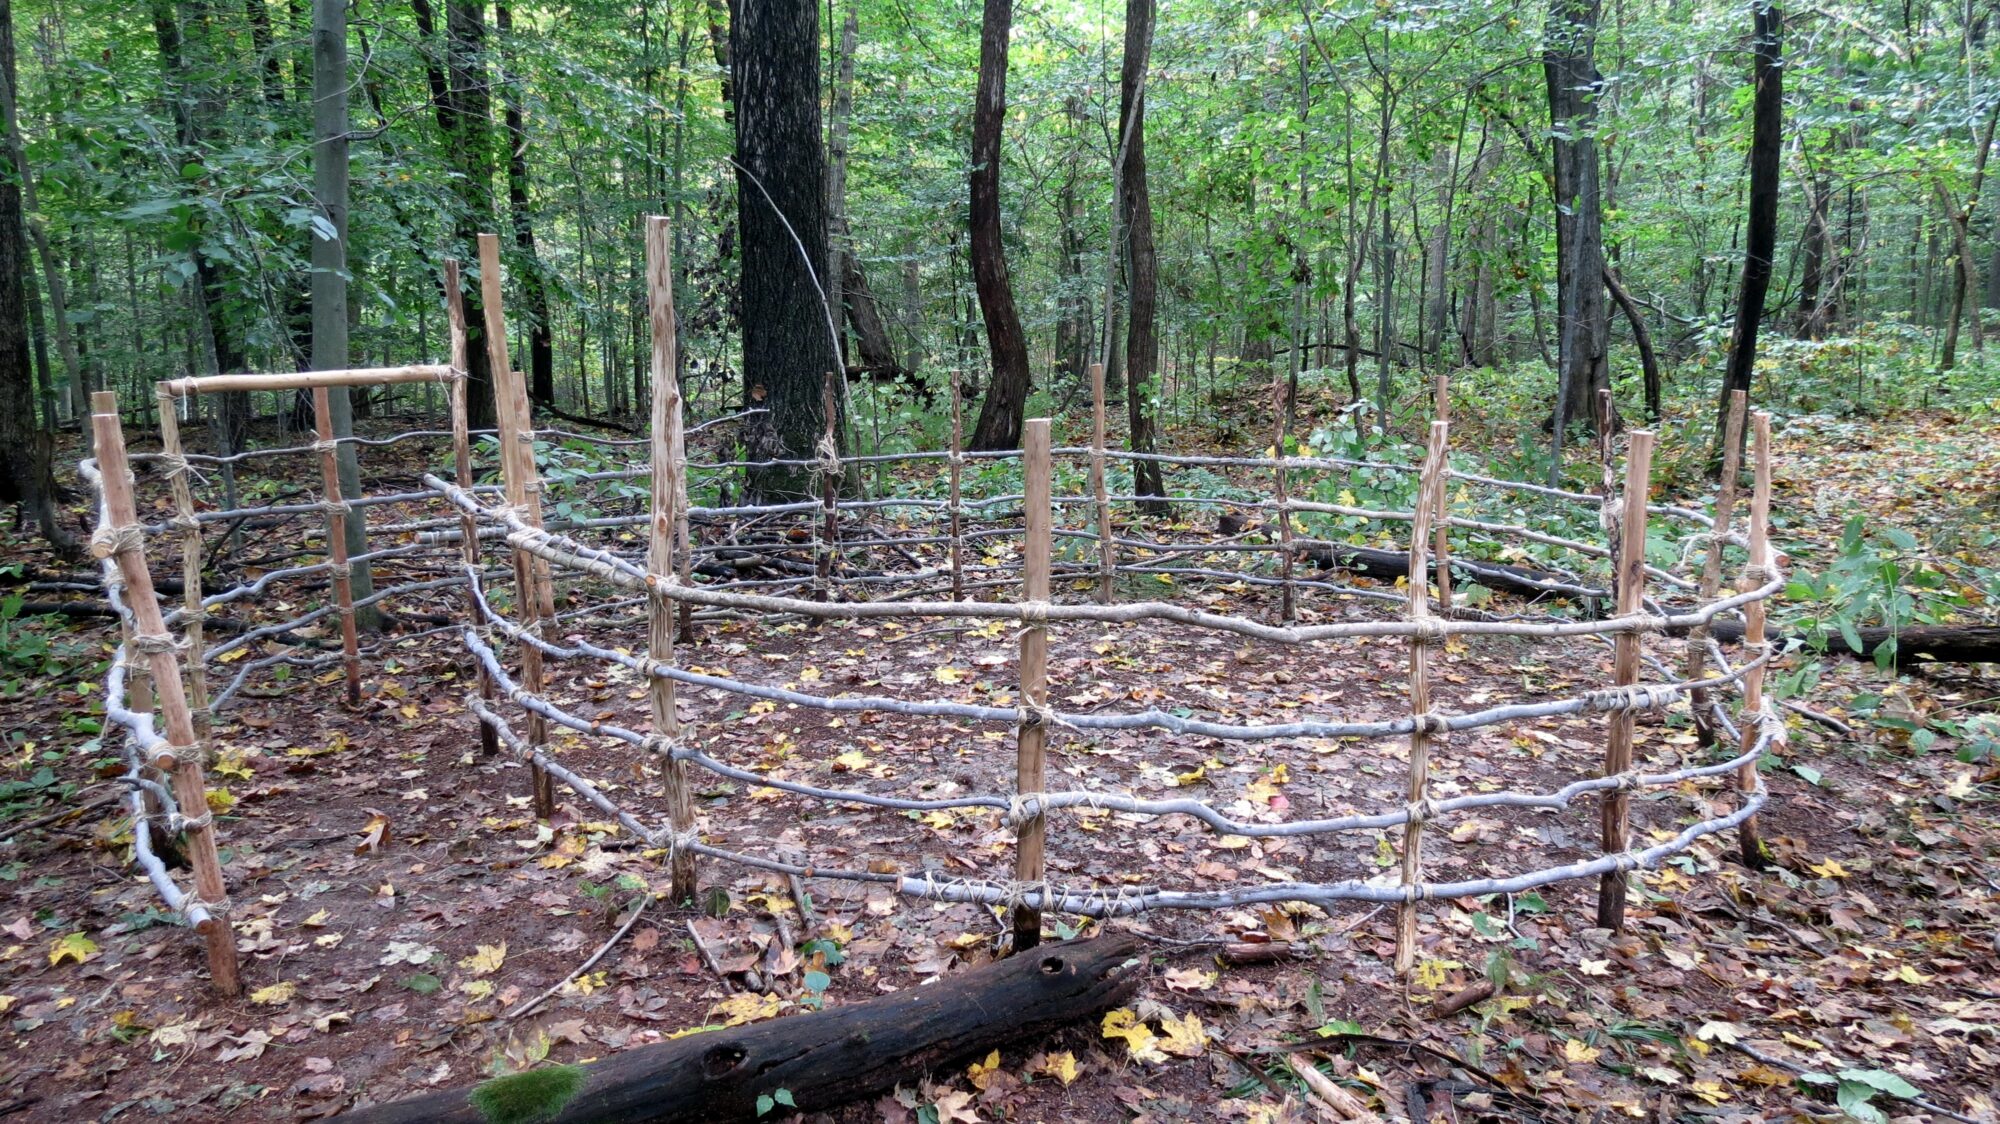
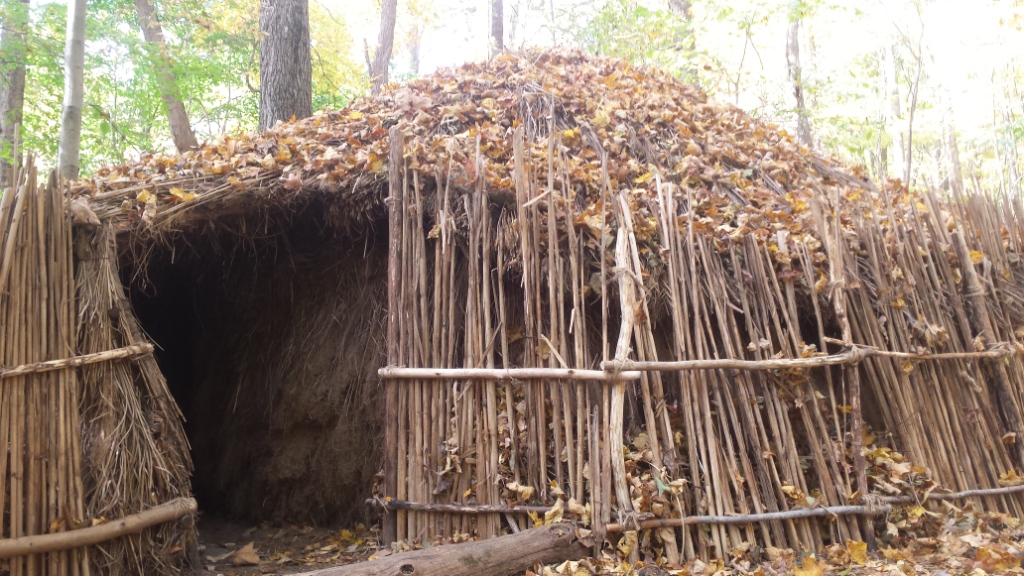
After the first winter though, I decided to add the debris
wall. I added another ring of stakes pounded in, used saplings to wrap for
strength and then lined with reed and cattail stalks. The wall was about two feet
from the interior wall and ended at the roof, so most the water would flow down
the outside.
And then it was time for leaves- lots and lots of leaves. I
filled the wall densely with leaves, creating a two foot wall, in addition to
the thatch. Needless to say, the shelter was toasty warm the second winter.
I also built a lean-to roofed with debris to help keep some
of the rain off my firewood.
My
last addition: a latrine cover. When you
have to go out no matter the weather, it’s nice to have a little cover, and in
our case, a little privacy, when you need the latrine.
Here she is all winterized and glowing in the moonlight.
I had originally thought I’d only do this wall for winter,
but after all the work, I’m not sure I would have taken it down. I moved out in
April, so didn’t do it, knowing the whole thing would need to come down when I
left. For this environment, I decided the thatch wasn’t the best idea, I should
have done debris to start, but it was very interesting for me and for others to
see and experience.
And finally, the very sad day when I had to return her to
the Earth. I cannot describe the spiritual, emotional and physical connection
you have with a shelter you have built and lived in. I couldn’t even tell you how
many hours I spent building and modifying this shelter, yet in half a day, she
came down and was returned to the Earth. More than a few tears were spilled.
Goodbye to the most wonderful home I ever had. You will always
be a part of me.
Living in a shelter with only fire and lamps for lighting, not to mention the short days, winter can be quite dark. Cordage is the perfect skill to work during the winter months. The same is true if you’re living in a house. No matter the weather, you can still sit and make cordage, if you’re lucky, by a nice fireplace!
When things are busier during the other seasons, it’s difficult to find the time to make the cordage you need for projects, construction, bow strings and all the other needs you’ll have for rope and string. In the winter, when you’re not active, you’ll spend much of your time near your fire to keep warm and you might as well keep your hands busy. I always find making cordage rather meditative, so it fits very well with the spiritual and physical quieting of winter.
Ideally, you’ve gathered many materials already, but if not, it’s not too late to get some of the plant fibers such as dogbane, nettles (they’re dry now so there’s no sting) milkweed, or any other plant that grows in your area. You can also get inner bark, even though it’s not the ideal season. Whether you think it’s good or not, try all kinds of things. Some may not be strong, but you don’t always need strong. If you don’t have gathered materials, anything like raffia, jute or corn husks work for practice. If you don’t know how to make cordage, this is a great little video that provides instruction.
Once you’d tried one thing, start experimenting. How strong are the different types of fiber? Don’t be afraid to break a few by pulling as hard as you can. It’s the only way to learn…and better now than when you need it to work. What fibers are strong enough and hold up to the friction of the bow drill? Which fibers would be strong enough with a very thin string for fishing?
One thing you’ll quickly learn is just how long it takes to make usable amounts of cordage. When I finish a piece, I wrap it around a small length of a branch, creating a ball of cordage. I’ll add other pieces as they’re completed. I also keep several sticks with different sizes or strengths of cordage, just like you have rope, string and thread in your house.
Cordage is an important skill. Even in modern living we use lots of string and rope. In primitive living, you’ll use even more. So start twisting and have fun!
Experience is everything and sometimes experience is limited by time. It only takes a few cold nights in a debris hut to learn to make modifications that make it much more comfortable, but some skills, like plants, have built in time restraints. Most plants have a limited time, sometimes only a couple weeks, when a certain edible or medicinal quality is viable. If we don’t learn it this year, we have to wait another whole year to try again. Or gardening. I’ve tried two summers for a forest garden and have learned a great deal but have yet to have a successful garden. When you start looking at how many years it could take to learn something, you begin to realize that all human life has a limited number of years. So it’s best to start new skills now if we ever want them to be useful to us. You can build a debris hut any time, but spring shoots are gone in a blink of the eye. Visit our website for some great book on edible and medicinal plants!
One thing people often neglect when considering survival living is food storage and preservation. It all sounds so easy- dry it, smoke it, make containers for it…but each has its own challenges and learning curve. So much depends on the variables of your environment. Dried food doesn’t stay dry if it’s exposed to humidity or liquids, rawhide doesn’t store food well in the same conditions. Pottery is great, but is a whole skill set in itself. So it’s wise not to neglect experimenting with these important skills. Try drying some foods- fruits can be dried in the sun, but greens need the shade. Try smoking some meat on a primitive rack and see the challenges. Some of my biggest have been yellow jackets- especially with turkey jerky. Man, they were relentless. Experiment with temperatures- how well do things store in the cool of the ground? How do you store potatoes so they don’t rot? All fun experiments that can teach us a lot about making the food we’ve gathered at great cost, stay viable until we need it. And finally, there’s the little cooking tip. With no refrigeration, what do you do with leftovers? Well, the photo of my stew is a stew that was started about six weeks ago. It’s never been refrigerated, and I’ve never been sick. The trick? It needs to be brought to a boil every day or two. The cooler the weather, the longer I’ve tested that, but it is definitely fine to eat if boiled every day. Any bacteria that had started to grow are killed each day. If it’s a fatty stew, the fat can also seal out the bacteria from reaching the food. I just add meat every 5-7 days and vegetables every 2-3 days and the it’s fine. It’s also constantly changing so I don’t get bored with it and it tastes great and is very nutritious. So have some fun experimenting with food.
Just got to town after 2 1/2 weeks being snowed in. I learned a lot about emergency preparedness, so thought I’d share some of my experience. First know, this storm was not forecast at all, and in this area, if we get 6 inches of snow we think we’ve got a lot! So when 2 1/2 feet of snow fell in two days, the area was totally unprepared. Because of the lack of normal snow, the area is also not prepared with snow plows and other things that help people get back to normal and since the trees are not used to this much snow, there was an incredible amount of tree damage which also took out the power. There are people who will not have power for a couple more weeks yet.
My situation is a little different since I already live off-grid, but, I had challenges others didn’t. My first challenge was the yurt itself. I’d recognized a problem with the installation before- the door opens out onto a small deck- no room for snow- so I was diligently opening the door throughout the day to make sure I could keep it open. I did this last a 1 a.m. and drank water so I’d wake up soon, but unfortunately I slept 6 hours and by the time I got up, the door was blocked- I was trapped inside the yurt. I had just brought in 2 gallons of water (and emptied the compost toilet) the day before, but usually I have a full five gallons of water available. I was almost out of propane for the heater- there was a full tank in the car, now inaccessible and all but three pieces of my firewood were outside under tarps and now over 2 feet of snow. So I had a little situation- no real danger yet, but I needed to take care to conserve water and stay warm. By day four, I was getting low on water so decided it was time to use my last resort plan on the door. As I said, there was very little propane left and I’d saved it to try this. I pointed the heater at the door hoping the warmth would help melt the snow. It certainly wasn’t enough (especially with the added snow from the roof which had slid down), to get the door actualy open, but because the door’s bottom hinges were unattached (due to previous problems) I was able to get enough to melt so I could get my arm out enough to use my machete to break the icy snow and scoop enough to basically push the top out a bit over the snow. This was enough to climb out, go to the car where I had more water (and cat food).
Then it was time to just wait for the snow to melt. It froze every night and most days didn’t get above 35 degrees so, as you can guess, the snow was going no where quickly. Without phone or internet, I was anxious because I knew my sister would be really worried. A week in, a Tracker friend, Michael and two of my neighbors who I didn’t even know, made the mile long hike through deep snow to come up and check on me. I was so incredibly grateful. Michael had brought some supplies and took a message out to my sister. They helped clear the porch and get my other tank of propane up to the yurt.
Then the days just went by with very little movement from the snow. I ran the car for a while every afternoon to charge my Kindle so I could read at night (I read 14 books during the time there : ), and listen to the news on the radio. I kept hoping for more on the weather, but very little was provided. We finally had a couple days in the low forties so I had hopes…but so little melted every day. I had to bring up water from the lower shelter where the rain barrels are and it was a bit unnerving, because even then, the snow was up over my knees. I started to slip once and had images of breaking my leg out there alone by myself. I took great care, but accidents could happen. I’d create scenarios of what I would do just in case something happened. It snowed again on day 10- got a bit depressed and my heater quit working. I had only used it a couple hours first thing in the morning but a little heat is better than none.
By two weeks, I was starting to count my food. I am usually better prepared, but the recent loss of my mother has had my schedule a mess as I deal with the many things needed to handle her estate. I had planned to shop the day after the storm hit, so I was low on fresh food to start with. This was one important lesson about making sure your emergency foods are really kept separate and that you don’t start using them for convenience. I had just added a bunch to my stew though so that did well for a long time and I just kept adding what I could. Finally amaranth and quinoa so it was a breakfast soup. I did end up eating it all eventually so my “unending stew” ended at 6 months- I’d hoped to keep it going a year- just keep adding.
So the last five days I spent shoveling snow (with a regular shovel which was all I had) to try and get the center mound down and where it was deeper. There were many small trees caught in the snow and ice which I had to dig up and many others that had to be cut or moved off the quarter mile driveway. I finally decided to try and drive out (low rider car with no chains- but all wheel drive). Getting down the first part wasn’t too bad, but when it starts up hill I’d get going, get stopped, back up and try again. Slide around. Get out and dig. Try again and I was gradually making it up the driveway. Then at one point I accidentally got off the gravel and was quickly mired in mud. I tried everything I could to get out but finally gave up and decided I’d have to walk out and get help the next day. The next day was a constant alternation of pouring rain and hail. I decided to wait and see if that helped melt the snow. The next day was bright and when I started out I planned to try the car one more time with little hope. I said an empassioned prayer for help. And miraculously, with some maneuvering, I actually got the car out of the mud and back on the snow covered gravel driveway. I had hopes the gravel road would be better than the driveway since it got much more sun. It was better in most places and in some completely clear. The guys had told me a big tree had come down but one of the neighbors had said he’d try and get it down- he hadn’t, but what I discovered was it was high enough that if I cut some branches, I could make a little tunnel. There were other numerous trees down but they were small enough for me to saw and move. Then almost down to the road, there was an apple tree across the road. I was able to cut enough back that my car could squeeze by- thank god for small cars! Getting on the road and driving and going to town was a bit surreal but a welcome relief. The shower, groceries and communication with folks was outstanding!
Lessons for Emergency Preparedness: * Keep dedicated food and supplies separate from your normal supplies so you know it’s there when you need it. Not just food, but toilet paper, kleenex, coffee, whatever is essential to you. : ) *Keep these things together in a tote (or more if you have more people/supplies). This can be loaded in a car if you need to quickly leave in an emergency. *** Check the calories! I was surprised to find many of my soups had very few calories- as low as 100 total for the two serving size. The highest was 270 calories. If you each soup three times a day as your meals you will be getting less than 1000 calories. This may be fine in the summer, but staying warm takes calories as does any physical labor. Boxed rice and pasta have more calories- especially if you can add butter or oil. These, however, require water and cooking, so a balance is good. I was thankful for things like almond butter- fat and calories and wished I’d had more carbs available. Dried fruit is good, as is canned fruit. Having dried grains- I had amaranth, quinoa and Michael brought beans. All good. Also granola bars or other protein bars which have needed energy. *Don’t underestimate what might happen where you live. The Earth is changing. The weather is changing. Think beyond the normal threats to your region. *Know your water sources. I know when I lived in WA I was surprised when I lost my well water when the power went out. Don’t forget rain water. Rain collection isn’t legal everywhere so check, but if possible, collect rain water. In addition to your garden, it is usable by humans. It’s actually what I use all the time. I use a Brita filter for drinking and don’t even filter for cooking. So it would be good for you in an emergency at least. * Make sure you have a good emergency kit- candles, fire making, a means to cook (I use a GasOne propane stove which could be used in a house), a means to stay warm, books, cards, games- especially if you have children. There are comprehensive lists available- make sure your home is prepared. *Make sure you have plenty to stay warm- blankets, sleeping bags, more blankets. I spent most of my time in bed with the covers over my lap and a wool blanket over my head and shoulders- in addition to the hats and gloves and layers of clothing. * If it’s really cold. Eat something before you go to sleep- you’ll find it helps you get the bed warmed up. Notice in the morning how much colder you feel- even if it’s not even actually colder. Eat something- warm if possible- and the same temperature will feel much better to you.
If something happens, and you’ve prepared, you’ll be safe and have a surprising change to your routines. In many ways, these little emergencies can be fun- problem solving, something new- just try and stay positive, don’t panic and see what all you can learn from the situation.
One of the book reviews implies that I think guns are bad and only primitive weapons are good. I didn’t explain the reasoning in depth in the story, but it is a good distinction for a survival situation so I thought I’d provide a comparison. First, I don’t believe guns are bad. They can be crucial in hunting and protection. When they become problematic is in a scenario such as in the book. First, guns require bullets and a time will come when you run out. With all primitive weapons- bows, crossbows, atlatls…you can make additional ammunition as they are broken, lost or ruined. As long as there is nature, you will not run out of ammunition. A good compromise is a commercial hand held crossbow. You have the convenience of a “hand gun” but you can replace the darts and string if you have the appropriate skills.
The other critical difference is that guns are loud. If you are in a stealth situation, the firing of a gun will give away your location- and that you have resources. This could put you in more danger- or prevent you from hunting when you need to because of concerns about giving up your location. I also love a story Tom Brown Jr. shared about indigenous people in South America who were provided rifles for hunting monkeys. The hunter shot a monkey and immediately returned the gun. The European didn’t understand why- saying, “it’s great, you got the monkey.” The indigenous man replied, “with bows we would have gotten many monkeys. The gun was so loud it scared all the others away.”
So I have no moral problems with guns. i just believe that in a wilderness survival situation as described in the book, guns would be an unnecessary liability for those with the skills to make and use primitive weapons. With no more practice than it takes to effectively use a gun, you can learn to hunt with a primitive weapon. With a bit more work you can learn to make your own so you are never left feeling unarmed.
I know many people who have go-bags in which they carry seeds. I’ve learned a few things about seeds through my experience and research that I thought I’d share.
Most are probably aware that it is essential that the seeds are heirloom seeds. If you take hybrid or other modified seeds, they won’t produce seeds for you to store for future years. You may get something for one year, but that will be that. Heirlooms are original strains which produce seeds for future generations. If you haven’t done so, it is also important to research how to save seeds for the various plants you want to take.
Another critical piece to is find varieties to fit where you think you might go. There is a huge difference between those which will grow in a warm climate and those which can grow in a short, cooler growing season. If you plan to be somewhere further north, it is critical that you choose varieties with short growing seasons. You can get tomatoes that have 65 days to ripening and those with 95 days to ripening. If you are in the north trying to grow plants with 95 day cycles, your plants will never produce before the first frost. If you’re not sure where you might go, make sure you have variety. If you have to prioritize, look for things that can be dried and stored well, those that can provide things like starchy foods to get you through the winter and those that can be used in a variety of ways. And don’t forget fruit trees. If they can grow in the area, it’s an investment in the future to take seeds to grow them.
Consider what you take. I’ve talked about some of the challenges of gardening in a wild setting in a previous post, so it’s important to be realistic about what you will try to grow. All of the non-native plants will have issues that natives don’t- whether it’s attractiveness to animals or challenges with the climate. So, in addition to “garden vegetables”, I would recommend taking seeds of wild plants that have already proven their ability to thrive in nature. If they are native to the area you are going, you have the ability to propagate patches near you, making it easier to gather. They also require much less water and most grow much faster. Believe it or not, you can order seeds for what many would consider “weeds” through many online stores. You can also wild harvest so you get some practice at seed saving.
The final reminder is that seeds don’t last forever. Many seeds need a cool, dry place out of the sun for longest storage. So, if you have seeds in a go-bag in your vehicle, you may need to check more frequently due to heat and humidity they may receive in the car.
Now is a great time to work on gardening. Try some no-till techniques, gather and preserve seeds, then see if they will germinate. Experiment! It’s fun and may make the difference so you’ll have yummy food in the future!